Deed
Treasured
   ~Super Savvy Seamstress~
Posts: 2,240
|
Post by Deed on Jul 17, 2005 16:16:24 GMT 10
Crocheting 101 a Tutorial
PLEASE DO NOT POST TO THIS THREAD
In the list of supplies is one 3 1/2 ounce skein, we are not actually going to be making a project out of this but swatches of different stitches that you will save for future reference. So if you have some on hand, use that, remember you don’t have to spend a lot to do a new craft.
If you have any questions I will be starting a separate thread for them, please do not post to this thread. You can also pm or email me with any questions you have. My email address is viewable if you click on my screen name.
I hope you all enjoy crocheting as much as I do!
|
|
Deed
Treasured
   ~Super Savvy Seamstress~
Posts: 2,240
|
Post by Deed on Jul 17, 2005 16:16:47 GMT 10
Here is a list of supplies you will need. * one 3 1/2 ounce skein knitting worsted weight yarn in a light color (it is easier to see your work than when using a dark color) * one size H aluminum crochet hook * one size 16 steel tapestry needle * pair of scissors 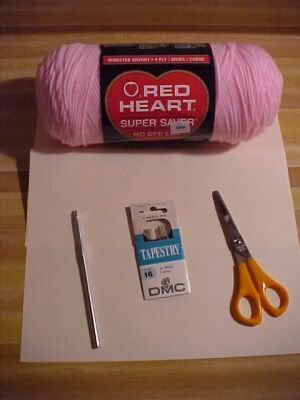 |
|
Deed
Treasured
   ~Super Savvy Seamstress~
Posts: 2,240
|
Post by Deed on Jul 17, 2005 16:17:29 GMT 10
Let‘s talk about yarn.
Yarn comes in many sizes, from fine crochet cotton used in making doilies and lace to bulky mohairs used for afghans and sweaters. The yarn we are going to use is worsted weight sometimes called 4 ply. It is available just about everywhere. I would suggest using RedHeart or Caron brands, they seem to be the best and are not too expensive.
You should be able to pick up a skein of yarn for anywhere between $1.50 to $3.50 depending on the prices where you live.
Always, always read your yarn labels! There is a multitude of information on them.
* How much yarn is in the skein or ball, this will be by ounces, grams or yards.
* The type of yarn it is (i.e. 2 ply, 3 ply, 4 ply, which means how many strands of yarn are twisted together to make each different weight of yarn and also the type of material the yarn is made out of i.e. acrylic, wool, wool blend, or cotton etc.)
* It‘s washablility. This is very important if you are making a child‘s hat, sweater or even and afghan You want it to be machine washable and dryable.
* Dye Lot - I can’t stress this one enough! A lot of yarns are now sold with no dye lot, but if there is a dye lot, you have to make sure you purchase enough yarn to complete your project with the SAME dye lot. If you do not do this and run short, take one of the yarn labels with you back to the same store and see if you can purchase another skein. If not, I would not purchase another skein of the same color, it may look visually the same to your eye, but when worked up into your project it will be slightly off in color and will be VERY noticeable. In this case I would consider using a contrasting color if it will be a finishing border around an afghan for example.
|
|
Deed
Treasured
   ~Super Savvy Seamstress~
Posts: 2,240
|
Post by Deed on Jul 17, 2005 16:17:49 GMT 10
Tapestry Needles
These are very inexpensive, blunt pointed sewing needles with a large eye that is big enough to carry the yarn for weaving in the ends and sewing seams. We will be using a size16 tapestry needle. You can purchase big plastic needles called ?yarn needles? but they are not as good as steel ones, mainly because they bend too much. You will have your steel tapestry needles for years. They run about $1.00 for a package of different sizes in Wal*Mart.
|
|
Deed
Treasured
   ~Super Savvy Seamstress~
Posts: 2,240
|
Post by Deed on Jul 17, 2005 16:19:34 GMT 10
Crochet Hooks We will be using aluminum crochet hooks, at the bottom of this post is a list of sizes available. The first size is U.S. with the metric conversion after it like this: B-1/2.25 . This is so the ladies that are in Canada or Europe can also learn if they would like to. Crochet hooks, come in many sizes, from very fine steel ones used in crocheting doilies and lace, to great big fat ones that are used in making bulky sweaters, fast and easy afghans or rugs. The hooks you will use most often in making sweaters and afghans are made out of aluminum. They are about 6 inches long and are sized alphabetically by letter from B (which is the smallest size) to K. I have said earlier that we will be using a size H hook, but everyone crochets differently and it may be wise to purchase 3 different hooks, sizes G-6/4.00, H-8/5.00 and I-9/5.50. You most often can purchase these in 3 packs with just these same sizes. A three pack runs about $4.00 to $5.00 and individual hooks run about $1.25 to $3.00 each depending on the size, smaller ones are usually cheaper. Don‘t quote me on the prices, it has been many, many years since I have had to purchase any hooks. I have had most of mine 25-30 years. Aluminum Crochet Hook Sizes B-1/2.25, C-2/2.75, D-3/3.25, E-4/3.50, F-5/3.75, G-6/4.00, H-8/5.00, J-10/6.00, K-10 1/2/6.50, N/9.00/, P/10.00, Q/15.00. Now the N-/9.00, P/10.00, and Q/15.00, in the U.S. usually are made out of plastic, but I have seen them in aluminum. I do not know what they are made out of in other countries. If you have inherited a set of hooks from your grandmother, they may be made out of bone. Cherish these!! They are very hard to come by and are heirlooms. In the photo below is a picture of a crochet hook. I am using a size K-10 1/2/6.50, this is so you can see the different parts of the hook easier. The above is quoted from Learn to Crochet in Just One Day by Jean Leinhauser. 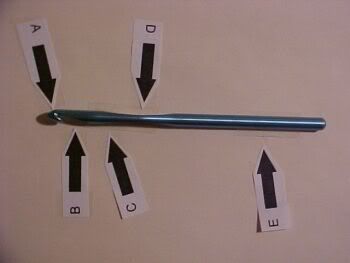
|
|
Deed
Treasured
   ~Super Savvy Seamstress~
Posts: 2,240
|
Post by Deed on Jul 17, 2005 16:20:35 GMT 10
Reading Patterns (abbreviations, symbols and terms)
Crochet patterns are written in a special language full of abbreviations, asterisks, parentheses, and other symbols and terms. These short forms are used so instructions will not take up too much space. They may seem confusing at first, but once understood, they are really easy to follow.
Abbreviations
beg ............................................... begin(ning)
bl(s) .............................................back loop(s)
ch(s) ................................................. chain(s)
dc ........................................ double crochet(s)
dec ........................................... decrease(-ing)
Fig ....................................................... figure
fl(s) ............................................. front loop(s)
hdc ................................. half double crochet(s)
inc ............................................. increase(-ing)
lp(s) ..................................................... loop(s)
patt ..................................................... pattern
prev ................................................... previous
rem ................................................ remain(ing)
rep .................................................. repeat(ing)
rnd(s) .................................................. round(s)
sc ................................................ single crochet
sk .............................................................. skip
sl ................................................................ slip
sl st(s) ........................................... slip stitch(es)
sp(s) .................................................... space(s)
st(s) .................................................... stitch(es)
Tch ................................................ turning chain
tog ....................................................... together
trc ...……...... (or tr) triple crochet (or treble crochet)
YO ....................................................... yarn over
Symbols
* An asterisk is used to mark the beginning of a portion of instructions which will be worked more than once; thus, ”rep from * twice“ means after working the instructions once, repeat the instructions following the asterisk twice more (3 times in all).
† The dagger identifies a portion of instructions that will be repeated again later in the same row or round.
: The number after the colon at the end of a row or round indicates the number of stitches you should have when the row or round has been completed.
( ) Parentheses are used to enclose instructions which should be worked the exact number of times specified immediately following the parentheses, such as: (ch 3, dc) twice . They are also used to set off and clarify a group of stitches that are to be worked all into the same space or stitch, such as: in corner sp work (2 dc, ch 1, 2 dc) .
[ ] Brackets and ( ) parentheses are used to provide additional information to clarify instructions.
Terms
Front loop: is the loop toward you at the top of the stitch.
Back loop: is the loop away from you at the top of the stitch.
Post: is the vertical part of the stitch.
Work even: means to continue to work in the pattern as established, without increasing or decreasing.
Wrong Side: Wrong side of the work - the side that will not show when project is in use.
Right Side: The side that will show.
Right-hand Side: The side nearest you right hand as you are working.
Left-hand Side: The side nearest you left hand as you are working.
Right Front: The piece of a garment that will be worn on the right-hand side of the body.
Left Front: The piece of a garment that will be worn on the left-hand side of the body.
The above is quoted from Learn to Crochet in Just One Day by Jean Leinhauser
|
|
Deed
Treasured
   ~Super Savvy Seamstress~
Posts: 2,240
|
Post by Deed on Jul 17, 2005 16:21:30 GMT 10
Gauge
I cannot stress gauge enough, it is the single most important thing in crocheting!
If you don‘t work to gauge, your crocheted garments may not fit correctly, and you may not have enough yarn to finish your project.
Gauge means the number of stitches per inch and rows per inch, that result from a specified yarn worked with a specified size hook. Since everyone crochets differently - some loosely, some tightly, some in between - the measurements of individual work can vary greatly when using the same size hook and yarn. It is your responsibility to make sure you achieve the gauge specified in the pattern.
Hook sizes given in instructions are merely guides and should never be used without making a 4“ square sample swatch to check gauge. Make the sample gauge swatch using the size hook and yarn and stitch specified in the pattern. If you have more stitches per inch than specified, try again using a larger size hook. If you have fewer stitches per inch than specified, try again using a smaller size hook. Do not hesitate to change to a larger or smaller size hook if necessary to achieve gauge.
If you have the correct number of stitches per inch, but cannot achieve the row gauge, adjust the height of your stitches. This means that after inserting the hook to begin a new stitch, draw up a little more yarn if your stitches are not tall enough - this makes the first loop slightly higher; or draw up less yarn if your stitches are too tall. Practice will help you achieve the correct height.
The above is quoted from Learn to Crochet in Just One Day by Jean Leinhauser
NOTE: Ladies this is why I said you may want to purchase a 3 pack of hooks or 3 separate hooks. For this tutorial I am using a size H-8/5.00. If you crochet too tight you would try using a size I-9/5.50, and if you crochet too loose you would change to a size G-6/4.00 to obtain the correct gauge.
Now get comfortable in your favorite chair and let’s start crocheting!
NOTE: All instructions are for right handed crocheting, please reverse for left handed.
|
|
Deed
Treasured
   ~Super Savvy Seamstress~
Posts: 2,240
|
Post by Deed on Jul 17, 2005 16:24:00 GMT 10
Starting your skein of yarn.
First you will have to find the end of the yarn in the skein. Sometimes it will tell you on the paper label how to start the skein, other times it has been started for you and is under the paper label, possibly wrapped around the skein under it. Pull out enough (3 or 4 yards) to start. You always want your yarn free flowing. If you are tugging on it while trying to crochet, you will not only get frustrated, you will end up with very tight stitches.
One note of caution, if you have kitties, ********, moving yarn is a GREAT toy!
Many a time I have been crocheting along only to come to a wet chewed through end of yarn! Believe me, this is really disgusting when you get to it! Ewwwww
|
|
Deed
Treasured
   ~Super Savvy Seamstress~
Posts: 2,240
|
Post by Deed on Jul 17, 2005 16:26:29 GMT 10
How to hold the crochet hook. In the following photos is shown how to hold your crochet hook. Now I am self taught, so use this as a guide. Hold your hook however is most comfortable for you. The first set of photos is the way most people I have seen hold their hook. The second way is the way my grandmother held hers. She was born in England and raised in Canada, so this may be the way she was taught. Alas she never had the patience to teach me. This first pic is of right handed from the top. 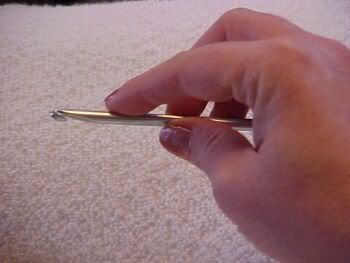 This photo is of right handed from the back side. Note the placement of your fingers. Your index finger is on B the throat of the hook. Your thumb and middle finger are on D the fingerhold of the hook (this is the flat part). And finally your ring finger and pinky are on E the handle of the hook. 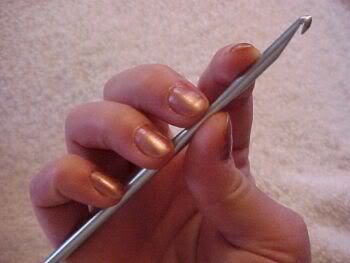 The following photos are the way my grandma held her hook. The first pic is right hand from the top. 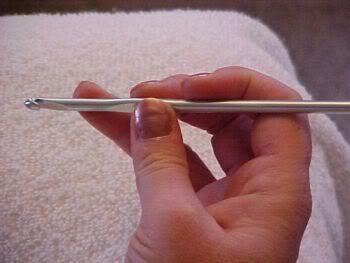 This is a photo of the way grandma held hers right handed from the bottom. It is just like holding an eating utensil, with your pinky sticking out. I can crochet holding my hook this way, but I am much slower. Note how your fingers are reversed. The thumb and middle finger are still on D the fingerhold (the flat part) but your index finger is now on E the handle, and your ring finger is on B the throat of the hook. Your pinky just sticks out! 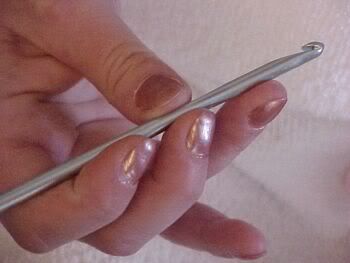 I'm sorry I can't crochet left handed, but I can show you how to hold the hook. The first pic is of left handed from the top. 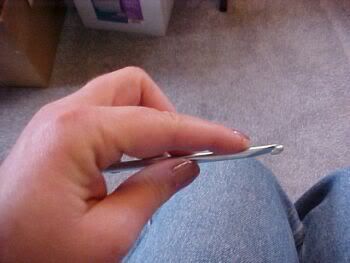 This is of left handed from the back side. Note the placement of your fingers. Your index finger is on B the throat of the hook. Your thumb and middle finger are on D the fingerhold of the hook (this is the flat part). And finally your ring finger and pinky are on E the handle of the hook. 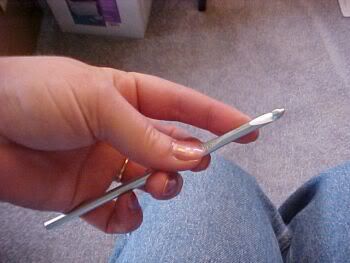 This is left handed from the top the way grandma held her hook. 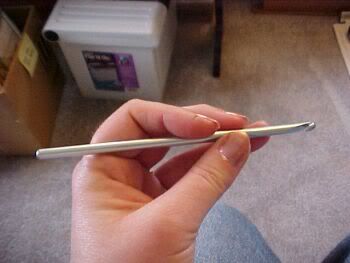 This is a photo of the way grandma held hers left handed from the bottom. It is just like holding an eating utensil, with your pinky sticking out. Note how your fingers are reversed. The thumb and middle finger are still on D the fingerhold (the flat part) but your index finger is now on E the handle, and your ring finger is on B the throat of the hook. Your pinky just sticks out! 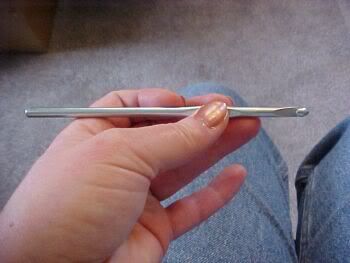
|
|
Deed
Treasured
   ~Super Savvy Seamstress~
Posts: 2,240
|
Post by Deed on Jul 17, 2005 16:27:45 GMT 10
Slip Knot In the following photos we are making a slip knot. This is how you will start every new project. Holding the end of the yarn in your right hand, twist into a loop as in the photo below. 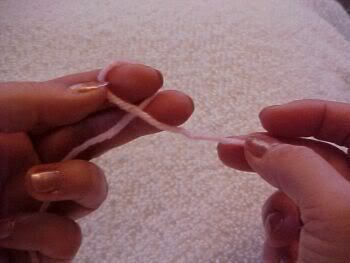 Next take the loose end of yarn and bring up behind the loop. 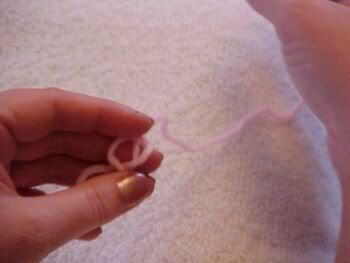 Now pick up your hook, go under and then up and pick up the yarn that is behind the loop. 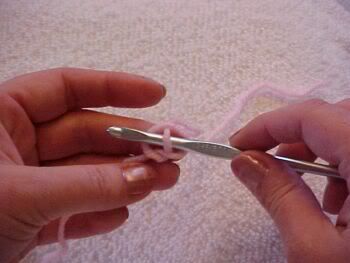 Now draw it up to make a knot. With your left hand, hold the tail end of the yarn and pull down. You want to snug it up to the hook. You do not want it too tight. If you look closely, I have about an 1/8 inch play in the loop with the hook. Congratulations!! You have just made a slip knot! 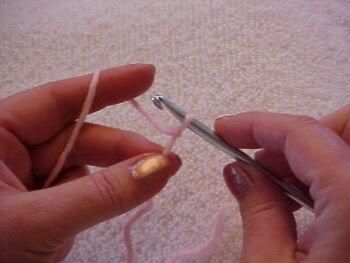
|
|
Deed
Treasured
   ~Super Savvy Seamstress~
Posts: 2,240
|
Post by Deed on Jul 17, 2005 16:30:25 GMT 10
How to make a chain (ch) Take your left hand and place the yarn over your index finger and hold loosely with your ring finger and pinky against your palm. (This is how you will control your tension. It may take some practice, so don’t get discouraged.) In the meantime hold the slip knot (with the tail end of yarn hanging down) with your thumb and middle finger of your left hand. The crochet hook is in your right hand.  Here is a back side view of how to hold the yarn in your left hand. 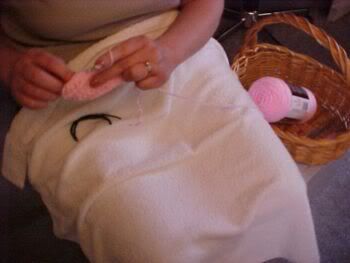 I put a white towel on my lap hoping you could see the contrast better. LOL I put a white towel on my lap hoping you could see the contrast better. LOL Now take your hook and wrap around the yarn. 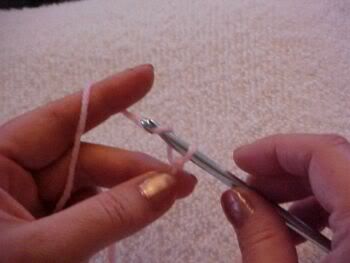 Pull through the loop. Not too tight and not too loose. You want to keep an even tension. 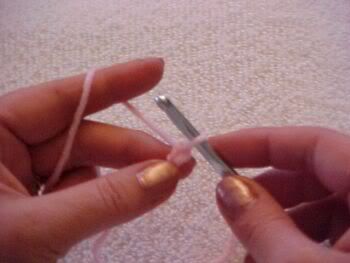 Now repeat the last 2 steps 5 more times. You will have 6 chain stitches. 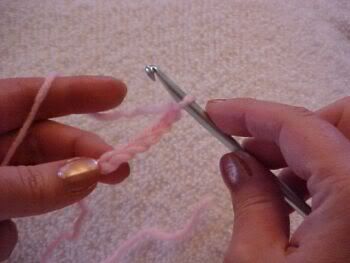
|
|
Deed
Treasured
   ~Super Savvy Seamstress~
Posts: 2,240
|
Post by Deed on Jul 17, 2005 16:32:52 GMT 10
Single Crochet (sc) To make a single crochet stitch, take your hook and insert it in the 2nd chain stitch from the hook, in the V and under the back bump (you will be picking up 2 strands of yarn in the chain). In the photo below I have placed a darker piece of yarn to show you the 2nd chain stitch from the hook. You will NEVER work in the first chain stitch next to the hook. 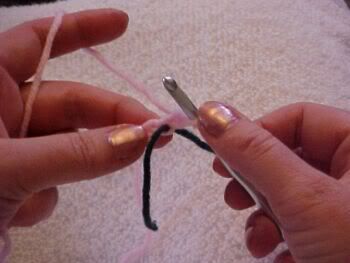 Now twist the crochet hook, and hook the yarn. 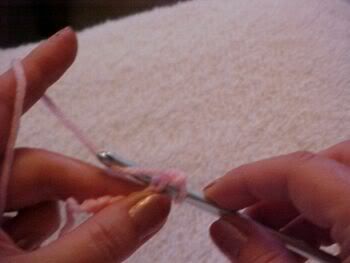 And pull through the loop. You now have 2 loops on your crochet hook 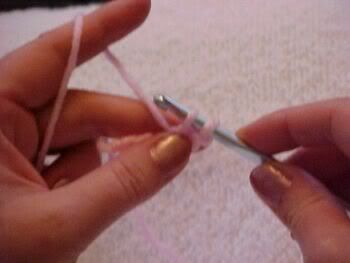 Now twist the crochet hook, and hook the yarn again. 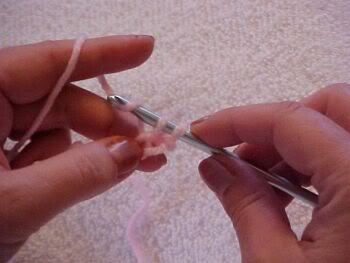 Now pull through both loops on the hook. You will have 1 loop on your hook and have made your 1st single crochet stitch! 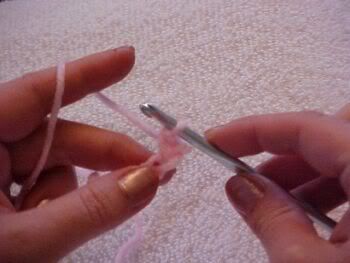 Now insert the hook in the next chain stitch as before, hook the yarn, and draw it through the chain stitch; hook yarn again and draw it through both loops. You have made another single crochet. Repeat this step in the remaining 3 chain stitches, taking care to work in the last chain stitch, but not in the slip knot. You have completed one row of single crochet and should have 5 stitches in a row. As you work, be careful not to twist the chain; keep all the V's facing you. The bumps are on the backside of the chain. Ladies I can honestly tell you, I HATE working the first row into the chain. It twists on me and is very hard to hold and control. Try and be patient and go slow. With practice you WILL be able to do it! 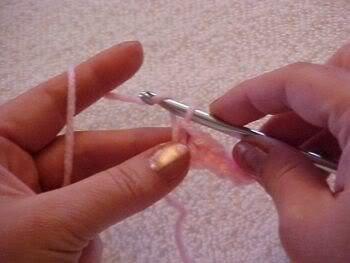
|
|
Deed
Treasured
   ~Super Savvy Seamstress~
Posts: 2,240
|
Post by Deed on Jul 17, 2005 16:35:28 GMT 10
Row 2 Now we are going to do a chain 1 and turn. To chain 1, hook the yarn and pull through the loop. This is called a turning chain .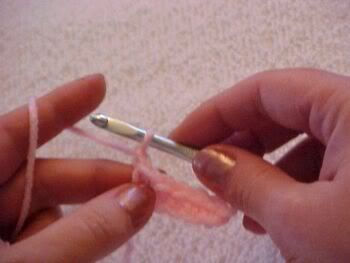 Now, without removing the hook , turn your work. You want to take the beginning of the row you just worked (by your right hand) and swing it away from you and over to the left. You are now looking at the back side of the row you just crocheted. 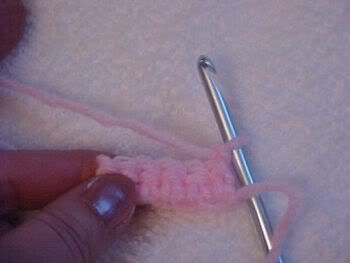 This row and all the following rows of single crochet (sc), will be worked into a previous row of single crochet, not into the beginning chain as you did before. Remember that when you worked into the starting chain, you inserted the hook through the center of the V, and under the bump. This is only done when working into a starting chain. To work into a previous row of crochet, insert the hook under both loops of the previous stitch. I have tried to highlight this with a dark strand of yarn. 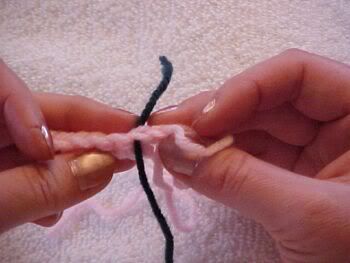 Here is the hook being inserted. 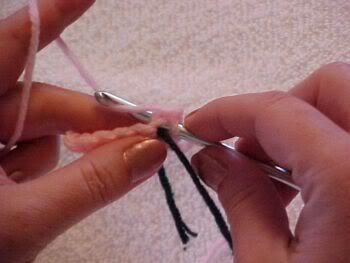 Hook the yarn and pull through the loop. You will have 2 loops on your hook. 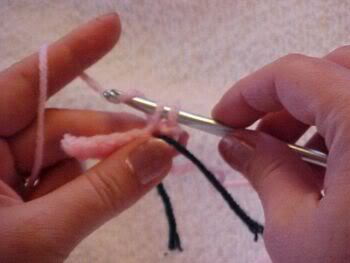 Hook the yarn again and pull through both loops on the hook. You have just made the first single crochet of the 2nd row. 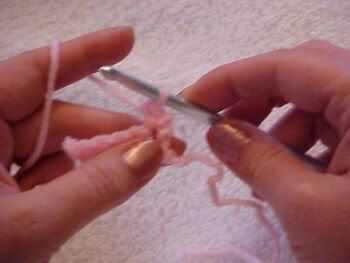 Now insert the hook in the next stitch as before, hook the yarn, and draw it through the stitch; hook yarn again and draw it through both loops. You have made another single crochet. Repeat this step in the remaining 3 stitches, taking care to work in the last stitch. You have completed one row of single crochet and should have 5 stitches in a row. NOTE: The first single crochet of the row is worked in the last stitch of the previous row, not into the turning chain. Work a single crochet in each single crochet to the end, taking care to work in each stitch, especially the last stitch, which is easy to miss. Stop now and count your stitches; you should still have 5 single crochets on the row. 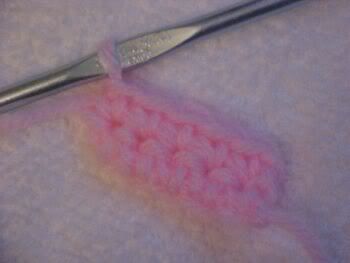 To end Row 2, after the last single crochet, chain 1 (for the turning chain), and turn the work counterclockwise. Here is the way instructions for Row 2 might be written in a pattern: Row 2: Sc in each sc; ch 1 turn. Note: To save space, a number of abbreviations are used. Make sure you print out the abbreviations posted earlier in the thread, you will be referring to them frequently until you remember what they stand for. Working row 3 Row 3 is worked exactly as you worked Row 2. Here are the instructions as they would be given in a pattern: Row 3: Rep Row 2. Now wasn‘t that easy? For practice, work three more rows, which means you will repeat Row 2 three more times for a total of six rows. 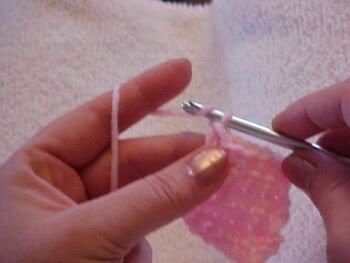
|
|
Deed
Treasured
   ~Super Savvy Seamstress~
Posts: 2,240
|
Post by Deed on Jul 17, 2005 16:37:31 GMT 10
Finishing Off It’s time to move on to another stitch, so let‘s finish off your single crochet practice piece, which you can keep for future reference. After the last stitch, chain 1. Now take your scissors and cut the yarn leaving a 6“ end. 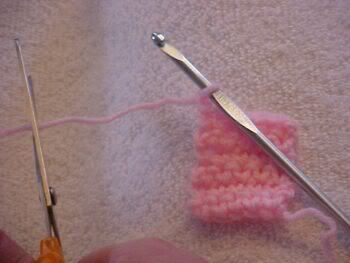 With your hook, pull the yarn all the way through the loop. Now snug it up and you have a completed swatch of single crochet! Now you can put the piece away, and it won‘t pull out. You may want to tag this piece as a sample of single crochet. Quoted from Learn to Crochet in Just One Day by Jean Leinhauser 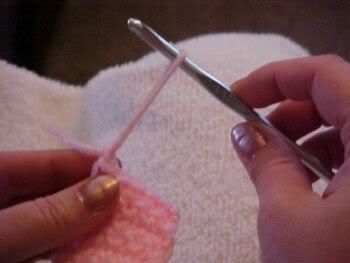 Completed swatch of single crochet. 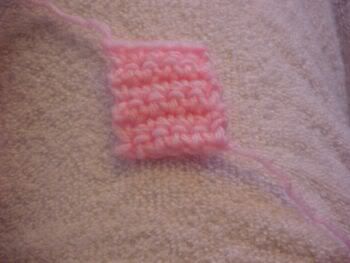
|
|
Deed
Treasured
   ~Super Savvy Seamstress~
Posts: 2,240
|
Post by Deed on Jul 17, 2005 16:41:17 GMT 10
Hint: Try to keep your stitches as smooth and even as possible; remember to work loosely rather than tightly, and to make each stitch well up on the working area of the hook. Be sure to chain 1 and turn at the end of each row, and to check carefully to be sure you‘ve worked into the last stitch of each row.
Count the stitches at the end of each row; do you still have 5? Good work!
Hint: What if you don‘t have 5 stitches at the end of a row? Perhaps you worked two stitches in one stitch, or skipped a stitch. Find your mistake, then just pull out your stitches back to the mistake; pulling out in crochet is simple. Just take out the hook, and gently pull on the yarn. The stitches will come out easily; when you reach the place where you want to start again, insert the hook in the last loop (taking care not to twist it) and begin.
If you need to put your work down.
When you want to pause to count stitches, check your work, have a snack or chat on the phone, you can remove your hook from the work -- but do this at the end of a row, not in the middle. To remove the hook, pull straight up on the hook to make a long loop.
Then withdraw the hook and put it in a safe place. Place your work in a safe place so the loop is not pulled out. To begin work again, just insert the hook in the big loop (don‘t twist the loop), and pull on the yarn from the skein to tighten the loop.
Quoted from Learn to Crochet in Just One Day by Jean Leinhauser
Safety Tips
Ladies I realize that the hook and darning needles are blunt pointed, but the are still very dangerous to a small child or pet.
PLEASE make sure you always put them away in a safe place where your children and pets cannot get to them.
Another tip is if you have cats, they love to eat your yarn! I always keep whatever I am working on in one of those plastic bags you get from the supermarket and tie up the handles. It not only keeps your work together and clean, it keeps it away from your furry friends!
End of Lesson 1
|
|