Deed
Treasured
   ~Super Savvy Seamstress~
Posts: 2,240
|
Post by Deed on Jul 12, 2005 3:49:31 GMT 10
Here is a step-by-step I did on how to make a basic tote bag a while ago. I thought it may come in handy for some of you. Please feel free to ask me any questions, or if the directions aren‘t clear, I will try and explain them better. Have fun sewing!  Please Do Not Post to This Thread Please Do Not Post to This Thread
Basic Tote Bag Tutorial
Pattern Materials: Pattern fabric or paper (optional) Ruler Pen or pencil 2/3 yard of fabric (24 inches) I am using upholstery fabric that I had on hand. Scissors Matching thread Iron and ironing board 2 - 20” pieces of 1” wide webbing (optional) webbingYou can use any of the following to make your tote bag: 100% Cotton; Corduroy, Denim, Cotton Twill, Upholstery, Canvas, Home Dec fabrics or Nylon. I wouldn't use a knit fabric, these tend to stretch too much. 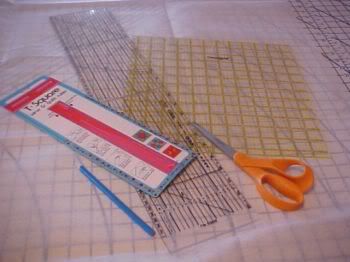
|
|
Deed
Treasured
   ~Super Savvy Seamstress~
Posts: 2,240
|
Post by Deed on Jul 12, 2005 3:49:58 GMT 10
I chose to make pattern pieces because I plan on making a tote again. I only want to do this once instead of each time I make a tote. You can measure and mark on the wrong side of your fabric if you chose to. These measurements I am giving you will make a 14” x 14” tote. Plenty of room to carry your knitting, crocheting, portable craft or even a plastic bag from the grocery store. To make your pattern pieces. Measure out 15 ¼” wide by 16 ¼” long . In this tutorial I am using 5/8” seam allowances. To use ½” seam allowances you will cut your piece 15” wide by 16” long. This is for the body of the tote bag. After you cut out your pattern piece, you will need to add a grain line. Take the straight edge of your ruler and line it up with one of the side edges and draw a line. Add an arrow at each end of the line. I added notches on both sides, top and bottom of mine. This is because I may want to use this pattern again and if I use a fabric with stripes or plaid, I will need these for matching up. To do this, measure down from the top _____ “ (I used 8”) you can use any measurement you want, but you must use the same measurement on both sides. On top of your measurement mark make a notch ( ^ ). Now do the same on the other side. Do the same to the top and bottom, but this time make them double notches ( ^^ ). Mark your pattern pieces with the following information. Tote Bag ____” Seam Allowance (insert what you are going to use for a seam allowance here) Cut 2 14” x 14” Finished Size Date made (optional) Mark the Top and Bottom if you like, but you can tell by your grain line too.  |
|
Deed
Treasured
   ~Super Savvy Seamstress~
Posts: 2,240
|
Post by Deed on Jul 12, 2005 3:51:28 GMT 10
To make the pattern pieces for the straps, measure and mark 2” wide by 20” long. I made 2 of them, this saves me from cutting one set of straps out, unpinning from the fabric and doing it again for the second set. I can pin and cut out both sets at the same time. Add a grain line the length of the strap. Mark your pattern pieces with the following information. Tote Bag StrapCut 2 of Fabric ½” Seam Allowance  |
|
Deed
Treasured
   ~Super Savvy Seamstress~
Posts: 2,240
|
Post by Deed on Jul 12, 2005 3:51:46 GMT 10
Here is a picture of all your pattern pieces. 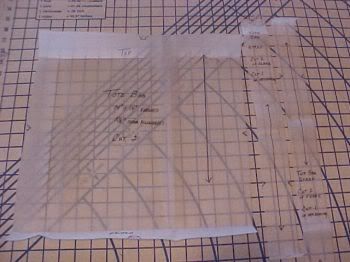 |
|
Deed
Treasured
   ~Super Savvy Seamstress~
Posts: 2,240
|
Post by Deed on Jul 12, 2005 3:52:08 GMT 10
Don’t forget to wash, dry and iron your fabric before using. You don’t want it to shrink and twist after you have made your tote bag! If I don’t say otherwise, I back stitch at the beginning and end of all my seams.
Pinning on and cutting out the pattern pieces. This is done in the same way you would with any other pattern. First fold your fabric with the selvages together, Next take your Tote Bag pattern piece and place it on the fabric and pin the top arrow of your grain line. Measure from the arrow to the fold and note this measurement. 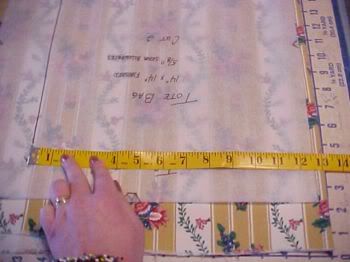 |
|
Deed
Treasured
   ~Super Savvy Seamstress~
Posts: 2,240
|
Post by Deed on Jul 12, 2005 3:52:29 GMT 10
Now take your measuring tape and place it on the bottom arrow of the grain line, measure across to the fold. If it is the same as your first measurement, place a pin in the arrow, if not pivot your pattern piece until it comes out exactly as the top measurement. Pin around the balance of the pattern piece. Now I have a stripe in my fabric. The best way to pin and cut out striped fabric is to do it on single thickness of fabric at a time. I can do it double thick for most fabrics. Here is the reason for my notches. See in the picture where I placed a pen at the top and bottom? These are where my double notches ( ^^ ) are, I want them to be in the exact same place on the fabric print.  |
|
Deed
Treasured
   ~Super Savvy Seamstress~
Posts: 2,240
|
Post by Deed on Jul 12, 2005 3:52:55 GMT 10
Do the same thing for the straps, measuring from the top and bottom of the grain lines and pin in place. Cut out your pattern pieces. 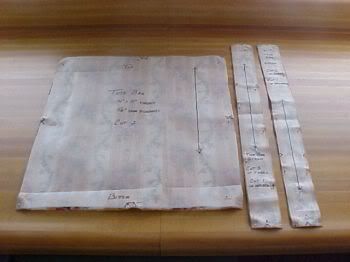 |
|
Deed
Treasured
   ~Super Savvy Seamstress~
Posts: 2,240
|
Post by Deed on Jul 12, 2005 3:56:28 GMT 10
As you saw in the above pictures, when I make pattern pieces I make my notches on the inside of the pattern pieces. I cut the pattern piece out straight and then mark the notches afterwards. The single notches ( ^ ) get marked with a single snip (1/8” deep). Sorry these pictures came out blurry. 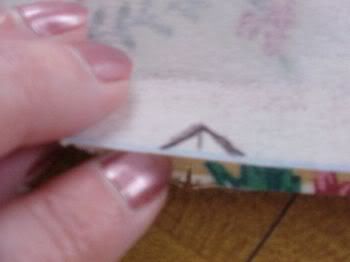 |
|
Deed
Treasured
   ~Super Savvy Seamstress~
Posts: 2,240
|
Post by Deed on Jul 12, 2005 3:56:59 GMT 10
The double notches ( ^^ ) get marked with 2 snips (1/8” deep). 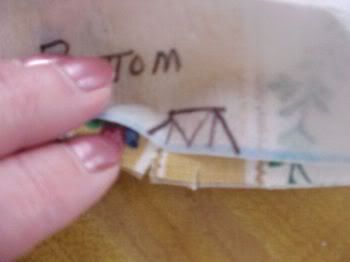 |
|
Deed
Treasured
   ~Super Savvy Seamstress~
Posts: 2,240
|
Post by Deed on Jul 12, 2005 3:57:26 GMT 10
Remove the pattern piece from the tote bag. With right sides together, match up notches and sew the bottom seam using either a ½” seam allowance or 5/8” seam allowance, which ever you allowed when making your pattern. Don’t forget to pay attention whether your fabric has a one way design and stitch the appropriate end as the bottom. Mine not only had a stripe, it also has a one way design. Finish off. the seam. You can do this a few different ways, these are all used to stop fraying. A tote is going to get a work out carrying possibly heavy items, so I would finish off my seams. Trim with pinking scissors Stitch a zigzag along the inside of the seam allowance Finish off with a serger. If using a zigzag stitch or trimming with pinking shears, Press seam open. I chose to do Flat Felled seams on the sides and serged my bottom seam. With right sides together, stitch both side seams, matching notches. Finish off seams and Press open. If finishing your seam with a zigzag stitch, it is sometimes easier to finish each side of the seam before you actually stitch the seam.  |
|
Deed
Treasured
   ~Super Savvy Seamstress~
Posts: 2,240
|
Post by Deed on Jul 12, 2005 3:57:50 GMT 10
Here is how your seam edge should look when using a zigzag stitch to finish off the seam. 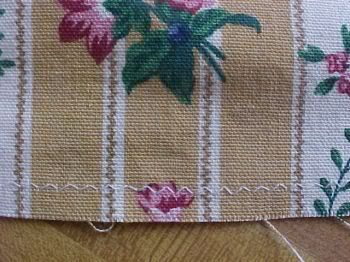 |
|
Deed
Treasured
   ~Super Savvy Seamstress~
Posts: 2,240
|
Post by Deed on Jul 12, 2005 3:58:17 GMT 10
Squaring off the bottom. This is optional. I chose to do this because a tote that can stand up is more useful to me. Match up the side seam with the bottom seam. 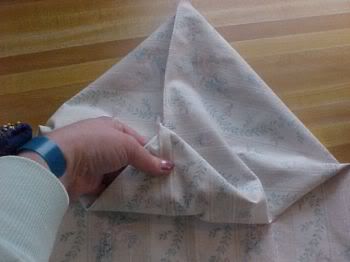
|
|
Deed
Treasured
   ~Super Savvy Seamstress~
Posts: 2,240
|
Post by Deed on Jul 12, 2005 3:59:01 GMT 10
Lay it on a flat surface and using your ruler, mark up between 2” to 3” from the point on the bottom of the tote. I used 3” so I have a square looking tote bag. You will need to use at least 2” in or you won’t have much of a bottom. Note the corner point is on 3” on my ruler, just under the 'Omnigrid' on the ruler.  |
|
Deed
Treasured
   ~Super Savvy Seamstress~
Posts: 2,240
|
Post by Deed on Jul 12, 2005 3:59:45 GMT 10
Mark like this. 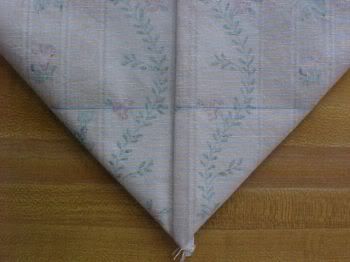 |
|
Deed
Treasured
   ~Super Savvy Seamstress~
Posts: 2,240
|
Post by Deed on Jul 12, 2005 4:00:24 GMT 10
Pin in place and stitch on the line you just made. Trim off the excess and finish seam allowance. Do the same to the other side.  |
|